mNo edit summary Tag: Visual edit |
Tag: Visual edit |
||
| Line 1: | Line 1: | ||
| + | {{weapon infobox |
||
| − | {{Map Infobox |
||
| + | |damage1=200 + (20 x 3) |
||
| − | |map=The Depths |
||
| + | |damage2=1750 |
||
| − | |region=Swamp |
||
| + | |speed1=8 |
||
| − | |stage number=[[Abandoned Lab|<<]] 4 - 1 [[The Labyrinth|>>]] |
||
| + | |speed2=1 to 0.4 |
||
| − | |waves=10 |
||
| + | |clip1=28 |
||
| − | |starting resources=300 |
||
| + | |clip2=1 to 28 |
||
| − | |resources per wave=180 |
||
| + | |dps1=2080 |
||
| − | |total resources=1920 |
||
| + | |dps2=1750 per enemy |
||
| − | |tower bases in field=0 |
||
| + | |time1=3.5 |
||
| − | |starting tower bases=3 |
||
| + | |time2=1 to 28 |
||
| − | |total tower bases=21 |
||
| + | |weakspot1=30%<br>(per shot) |
||
| − | }} |
||
| + | |weakspot2=- |
||
| + | |reloading time=3}} |
||
| − | == |
+ | == Overview == |
| + | * This weapon is available at [[Player Ranks|rank]] 18 for players, that have the Road to Elysion [[Downloadable Content|DLC]]. |
||
| − | * You will be doing most of the damage yourself, since the Towers often do not have the right range / orientation to be effective. |
||
| + | * Fire modes |
||
| − | * You will want to boost your '''weakspot''' damage, since the only place to attack [[Hoverer]] and [[Bobble Head]] lumes is the weakspot. That means using perks such as [[Marksman]] and weapons such as [[Plasma Rifle]]. |
||
| + | ** Primary Fire - the trigger can be held down for a fast rate of fire. |
||
| − | * At the start of each round, stand '''near''' the enemy spawn, since you want to shoot [[Hoverer]] lumes behind as they float past you. It doesn't help to sit near your core. |
||
| + | *** The primary mode applies damage over time (DoT) effect on the enemy per shot. |
||
| + | **** The effect ticks 3 times for 20 damage every 0.83 seconds (i.e. 60 DoT over 2.5 seconds). This amount of damage cannot be changed by perks. |
||
| + | **** The DoT effect does '''not''' trigger character-related damage bonuses, similarly to the [[Sub Mini-Gun|SMG]]'s poison DoT of the secondary fire mode. |
||
| + | ***** ''Character-related damage bonuses are [[Sweet Autumn|Sweet]]'s burn, [[Skye Autumn|Skye]]'s warming-up, [[Haigen Hawkins|Haigen]]'s proximity damage, [[TSYGAN]]'s empowered last shot and [[SiMo]]'s weakspot dmg bonus.'' |
||
| + | **** The damage over time can trigger perk-related debuffs such as [[Slowing Rounds]], [[Exposure Rounds|Exposure rounds]] & [[Synergy]] as normally, extending their effects. |
||
| + | **** The three ticks of damage will be applied even if the primary fire's shots don't deal damage due to '''flat''' enemy armour, i.e. [[Armoured Heavy|Armoured Heavies]], [[Super Heavy|Super Heavies]] & [[Bliskeblaske|Bliskeblaskes]] will always suffer the DoT damage, similarly to the [[Sub Mini-Gun|SMG]]'s poison of the secondary fire. However, to apply the DoT to partially-invulnerable lumes ([[Bobble Head|Bobble Heads]], [[Fiskeplaske]], [[Hoverer|Hoverers]] & [[Hoverer Queen|Hoverer Queens]]), the player has to hit their vulnerable body parts. |
||
| + | **** The shots can deal bonus (crit) damage when hitting weakspots, but the DoT is unchanged, like with the [[Sub Mini-Gun|SMG]]'s poison shots. |
||
| + | ** Secondary fire |
||
| + | *** The secondary fire creates a shockwave around the user. |
||
| + | *** The trigger can be held down to charge the weapon for more ammo, but using more ammunition increases only the range of the shockwave - the damage is the same, regardless of charges. |
||
| + | *** Holding the trigger at max and firing takes 2.5 seconds, thus meaning that a fully charged fire would take at least 2.5 seconds, although a non-held shot can be dealt every second. |
||
| + | *** The shockwave can hit not only ground lumes, but flying enemies as well, although it still requires the player to be close to them. |
||
| + | *** This fire mode '''cannot''' deal weakspot damage even if the crosshairs are lined up so. |
||
| + | *** This mode '''cannot''' damage partially invulnerable lumes ([[Bobble Head|Bobble Heads]], [[Fiskeplaske]], [[Hoverer|Hoverers]] & [[Hoverer Queen|Hoverer Queens]]), although [[Sweet Autumn|Sweet]] would apply her burning effect. |
||
| + | <br /> |
||
| − | == Best Loadout == |
||
| + | ==Notes & tactics== |
||
| + | *[[Skye Autumn|Skye]] can deal '''up to''' 9480 damage with a fully charged blast from the secondary fire with her natural ability and the [[Tactical Juxtaposition]] perk. This is enough to kill [[Walker]]s and [[Screamer|Screamers]] in one hit when playing in '''solo''' Campaign [[Game Modes|mode]], regardles of whether [[Feats of Strength|feats of strength]] are enabled, and can severely damage other nearby enemies. |
||
| − | ===Skye Autumn #1 (Level 40) === |
||
| + | *<nowiki/>[[Haigen Hawkins|Haigen]] <nowiki/>can deal a lot of damage using the secondary fire, due to his natural ability. Some damage perks such as [[Against All Odds]] and [[Tactical Juxtaposition]] can further increase the damage greatly. |
||
| − | ''5 Feats and Strength'' |
||
| + | *[[Sweet Autumn|Sweet]] c<nowiki/>an apply the burning debuff to multiple enemies with the secondary fire. |
||
| + | *The DoT<nowiki/> effects makes [[Soaker|Soakers]] more vulnerable, thus making the weapon very good vs them. |
||
| + | *If usin<nowiki/>g the weapon with [[Tactical Juxtaposition|Tactical juxtaposition]], one should be wary that if firing secondary fire before switching to the other weapon, there is a somewhat long delay before the switch, somewhat typical for the conversion of fast weapons into slow ones. This delay potentially can be outtricked via pressing the switch button quickly after firing similarly to the scenarios with the Assault Rifle & ETK-Tesla Prototype, although this appears difficult. |
||
| + | *Using t<nowiki/>he weapon with [[Hip Fire|Hip fire]] is mostly fine, since its crit damage is lower than 40% anyway and the perk would lead to more damage, regardless of whether hitting weakspots or not. |
||
| + | *[[Spray 'N Pray|Spray ']]<nowiki/>[[Spray 'N Pray|N Pray]] is somewhat good when picked with this weapon, since the secondary fire appears to not need specific aim, but with this perk the primary fire suffers from lowered accuracy. |
||
| + | *Using t<nowiki/>he secondary fire with the last ammo in the clip as a last tick of damage is a good way to deal more damage. |
||
| + | *While t<nowiki/>he secondary fire can deal good burst-damage to multiple lumes, the primary fire has higher single-target DPS. |
||
| ⚫ | |||
| − | '''Character''' |
||
| − | |||
| − | [[Skye Autumn]] for stacking damage bonus with the [[Drone Launcher]]. |
||
| − | |||
| − | Technically, [[SiMo]] also makes a great choice, because you can easily take advantage of the stacking '''weakspot''' damage bonus with consecutive hits. |
||
| − | |||
| − | '''Weapons''' |
||
| − | |||
| − | # [[Drone Launcher]]: Not only is it super effective against heavily/infinitely armored enemies such as [[Hoverer]], [[Bobble Head]], [[Armoured Heavy]], [[Super Heavy]], and [[Hoverer Queen]], it automatically seeks your targets! |
||
| − | # [[Plasma Rifle]]: For getting rid of [[Hoverer]] and [[Bobble Head]] lumes, which your Towers do little to no damage. Since you're hitting weakspots anyway, you will benefit from the bonus damage to weakspots by using a Plasma Rifle. |
||
| − | |||
| − | * You could alternatively use a [[Sniper Rifle]], but I find there is less recoil with the Plasma Rifle, and the bonus weakspot damage is excellent. |
||
| − | |||
| − | '''Towers''' |
||
| − | |||
| − | #[[Focus]]: Combine it with the [[Range Spire]] in that 2x3 area near your Core. |
||
| − | #[[Range Spire]]: Once you upgrade this to Level 3, the [[Focus]] Towers have immense reach. |
||
| − | #[[Violator]]: Very good range. You can build one near the center of the map to maximize coverage area. You'll need to adjust its targeting for each wave (For example, when the [[Hoverer Queen]] spawns, you want to set it to LEAST HEALTH so it doesn't waste its shot dealing 0 damage to the shielding front). |
||
| − | |||
| − | * Avoid the [[Anti-Air]]. Even though 3 waves have [[Spitfly]] enemies, they are not many, and your other towers can take them out, if not your Drones. |
||
| − | |||
| − | |||
| − | '''Perks''' |
||
| − | |||
| − | #[[Tactical Juxtaposition]]: Makes your [[Drone Launcher]] much more effective. |
||
| − | #[[Marksman]]: Boost your weakspot damage against everything, especially useful against [[Bobble Head]] and [[Hoverer]]. |
||
| − | #[[Reinforcements]]: To be honest, not especially useful. BUT! Very handy against [[Snorker|Snorkers]] who kamikaze against your Explorers, and for distracting [[Walker|Walkers]] to buy you extra time. |
||
| − | |||
| − | * Alternatively, you can swap out [[Reinforcements]] and replace it with a Core Protection perk, such as [[Unstable Core]] or [[Resilient Core]]. |
||
| − | |||
| − | |||
| − | == Build Order == |
||
| − | |||
| − | ===Wave 1=== |
||
| − | |||
| − | '''Starting Resources''' |
||
| − | * 300 Resources |
||
| − | * 3 Tower Bases |
||
| − | |||
| − | '''Enemies''' |
||
| − | |||
| − | * 5 x [[Bobble Head]] |
||
| − | |||
| − | '''Reward''' |
||
| − | * 250 Resources |
||
| − | * 2 Tower Bases |
||
| − | |||
| − | |||
| − | ===Wave 2=== |
||
| − | |||
| − | '''Enemies''' |
||
| − | |||
| − | * 4 x [[Bobble Head]] |
||
| − | * 3 x [[Soaker]] |
||
| − | |||
| − | '''Reward''' |
||
| − | * 250 Resources |
||
| − | * 2 Tower Bases |
||
| − | |||
| − | |||
| − | ===Wave 3=== |
||
| − | |||
| − | '''Enemies''' |
||
| − | |||
| − | * 3 x [[Hoverer]] |
||
| − | * 20 x [[Snorker]] |
||
| − | * 1 x [[Armoured Heavy]] |
||
| − | * 3 x [[Spitfly]] |
||
| − | |||
| − | |||
| − | '''Reward''' |
||
| − | * 250 Resources |
||
| − | * 2 Tower Bases |
||
| − | |||
| − | ===Wave 4=== |
||
| − | |||
| − | '''Enemies''' |
||
| − | |||
| − | * 8 x [[Hoverer]] |
||
| − | * 5 x [[Rhino]] |
||
| − | |||
| − | '''Reward''' |
||
| − | * 250 Resources |
||
| − | * 2 Tower Bases |
||
| − | |||
| − | ===Wave 5=== |
||
| − | |||
| − | '''Enemies''' |
||
| − | |||
| − | * 6 x [[Rhino]] |
||
| − | * 2 x [[Soaker]] |
||
| − | * 3 x [[Hoverer]] |
||
| − | * 1 x [[Armoured Heavy]] |
||
| − | * 6 x [[Snorker]] |
||
| − | |||
| − | |||
| − | '''Reward''' |
||
| − | * 250 Resources |
||
| − | * 2 Tower Bases |
||
| − | |||
| − | ===Wave 6=== |
||
| − | |||
| − | '''Enemies''' |
||
| − | |||
| − | * 20 x [[Walker]] |
||
| − | * 5 x [[Bobble Head]] |
||
| − | |||
| − | '''Reward''' |
||
| − | * 250 Resources |
||
| − | * 2 Tower Bases |
||
| − | |||
| − | ===Wave 7=== |
||
| − | |||
| − | '''Enemies''' |
||
| − | |||
| − | * 4 x [[Spitfly]] |
||
| − | * 5 x [[Bobble Head]] |
||
| − | * 4 x [[Screamer Matriarch]] |
||
| − | |||
| − | |||
| − | '''Reward''' |
||
| − | * 250 Resources |
||
| − | * 2 Tower Bases |
||
| − | |||
| − | ===Wave 8=== |
||
| − | |||
| − | '''Enemies''' |
||
| − | |||
| − | * 4 x [[Spitfly]] |
||
| − | * 16 x [[Snorker]] |
||
| − | |||
| − | |||
| − | '''Reward''' |
||
| − | * 250 Resources |
||
| − | * 2 Tower Bases |
||
| − | |||
| − | ===Wave 9=== |
||
| − | |||
| − | '''Enemies''' |
||
| − | |||
| − | * 1 x [[Armoured Heavy]] |
||
| − | * 4 x [[Rhino]] |
||
| − | * 3 x [[Screamer Matriarch]] |
||
| − | * 1 x [[Hoverer Queen]] |
||
| − | |||
| − | |||
| − | '''Reward''' |
||
| − | * 250 Resources |
||
| − | * 2 Tower Bases |
||
| − | |||
| − | ===Wave 10=== |
||
| − | |||
| − | '''Enemies''' |
||
| − | |||
| − | * 6 x [[Bobble Head]] |
||
| − | * 1 x [[Super Heavy]] |
||
| − | * 15 x [[Runner]] |
||
| − | |||
| − | |||
| − | |||
| ⚫ | |||
Revision as of 22:38, 30 September 2021
| Gatling Laser | ||
|---|---|---|
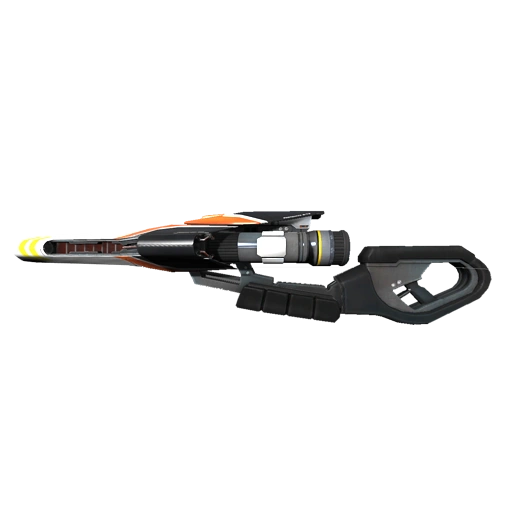
| ||
| Primary Fire | Secondary Fire | |
| Damage | 200 + (20 x 3) | 1750 |
| Shots per Second | 8 | 1 to 0.4 |
| Magazine Size | 28 | 1 to 28 |
| Damage per Second | 2080 | 1750 per enemy |
| Sustained Fire Time (seconds) |
3.5 | 1 to 28 |
| Weakspot Damage Bonus | 30% (per shot) |
- |
| Reloading Time (seconds) |
3 | 3 |
Overview
- This weapon is available at rank 18 for players, that have the Road to Elysion DLC.
- Fire modes
- Primary Fire - the trigger can be held down for a fast rate of fire.
- The primary mode applies damage over time (DoT) effect on the enemy per shot.
- The effect ticks 3 times for 20 damage every 0.83 seconds (i.e. 60 DoT over 2.5 seconds). This amount of damage cannot be changed by perks.
- The DoT effect does not trigger character-related damage bonuses, similarly to the SMG's poison DoT of the secondary fire mode.
- The damage over time can trigger perk-related debuffs such as Slowing Rounds, Exposure rounds & Synergy as normally, extending their effects.
- The three ticks of damage will be applied even if the primary fire's shots don't deal damage due to flat enemy armour, i.e. Armoured Heavies, Super Heavies & Bliskeblaskes will always suffer the DoT damage, similarly to the SMG's poison of the secondary fire. However, to apply the DoT to partially-invulnerable lumes (Bobble Heads, Fiskeplaske, Hoverers & Hoverer Queens), the player has to hit their vulnerable body parts.
- The shots can deal bonus (crit) damage when hitting weakspots, but the DoT is unchanged, like with the SMG's poison shots.
- The primary mode applies damage over time (DoT) effect on the enemy per shot.
- Secondary fire
- The secondary fire creates a shockwave around the user.
- The trigger can be held down to charge the weapon for more ammo, but using more ammunition increases only the range of the shockwave - the damage is the same, regardless of charges.
- Holding the trigger at max and firing takes 2.5 seconds, thus meaning that a fully charged fire would take at least 2.5 seconds, although a non-held shot can be dealt every second.
- The shockwave can hit not only ground lumes, but flying enemies as well, although it still requires the player to be close to them.
- This fire mode cannot deal weakspot damage even if the crosshairs are lined up so.
- This mode cannot damage partially invulnerable lumes (Bobble Heads, Fiskeplaske, Hoverers & Hoverer Queens), although Sweet would apply her burning effect.
- Primary Fire - the trigger can be held down for a fast rate of fire.
Notes & tactics
- Skye can deal up to 9480 damage with a fully charged blast from the secondary fire with her natural ability and the Tactical Juxtaposition perk. This is enough to kill Walkers and Screamers in one hit when playing in solo Campaign mode, regardles of whether feats of strength are enabled, and can severely damage other nearby enemies.
- Haigen can deal a lot of damage using the secondary fire, due to his natural ability. Some damage perks such as Against All Odds and Tactical Juxtaposition can further increase the damage greatly.
- Sweet can apply the burning debuff to multiple enemies with the secondary fire.
- The DoT effects makes Soakers more vulnerable, thus making the weapon very good vs them.
- If using the weapon with Tactical juxtaposition, one should be wary that if firing secondary fire before switching to the other weapon, there is a somewhat long delay before the switch, somewhat typical for the conversion of fast weapons into slow ones. This delay potentially can be outtricked via pressing the switch button quickly after firing similarly to the scenarios with the Assault Rifle & ETK-Tesla Prototype, although this appears difficult.
- Using the weapon with Hip fire is mostly fine, since its crit damage is lower than 40% anyway and the perk would lead to more damage, regardless of whether hitting weakspots or not.
- Spray 'N Pray is somewhat good when picked with this weapon, since the secondary fire appears to not need specific aim, but with this perk the primary fire suffers from lowered accuracy.
- Using the secondary fire with the last ammo in the clip as a last tick of damage is a good way to deal more damage.
- While the secondary fire can deal good burst-damage to multiple lumes, the primary fire has higher single-target DPS.